Blog 4 FOCUS – Depth: Deep & Shallow

I had a lot of fun with this project because it really made me think about the settings on my camera and the effects that they would give to the outcome of the images.  I love shallow depths of field because I think it helps bring a stronger focal point to your images, but it is also nice to have a deep depth of field when you are taking other shots such as landscape shots.  I was asked by my brother in law if I could take some engagement pictures for him.  We went met in Pocatello since they live in Logan.  This was somewhat of a challenge to finding somewhere to take the pictures since neither one of us were familiar with the area.  We went to a couple locations and got some great images.  I also got a few of my kids in between the location changes.

Deep Depth of Field:

JaleneStradling_Deep1

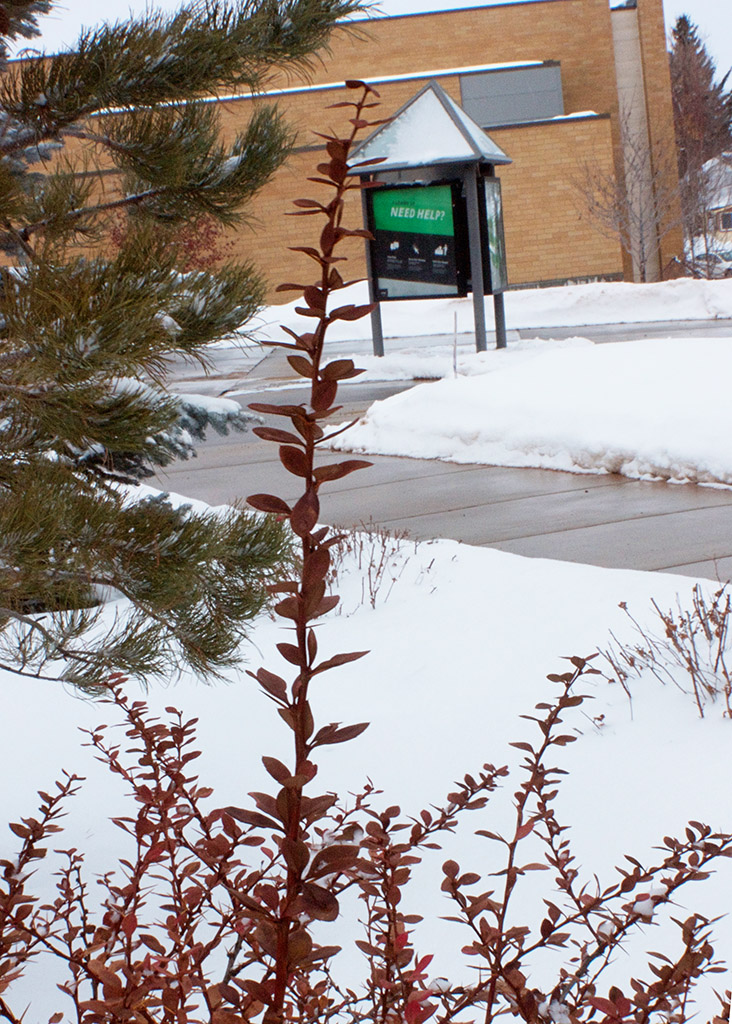
1. Campus Landscape  2. 1/20, 1:00pm, BYU-I Campus 3. Focal Length  50  4. F/stop 36  5. Shutter Speed  1/50 6. Outside light snowy day.

JaleneStradling_Deep2

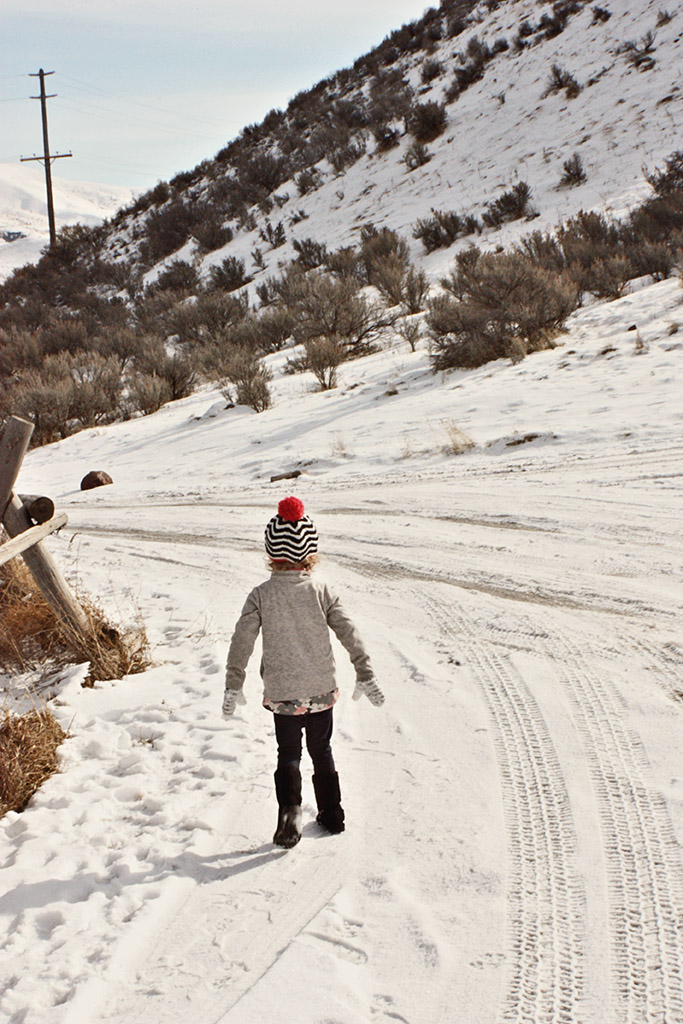
1. Snow Day Fun  2. 1/25, 12:30pm, Pocatello Mountains 3. Focal Length  55  4. F/stop 36  5. Shutter Speed  1/80 6. Outside light, sunny day.

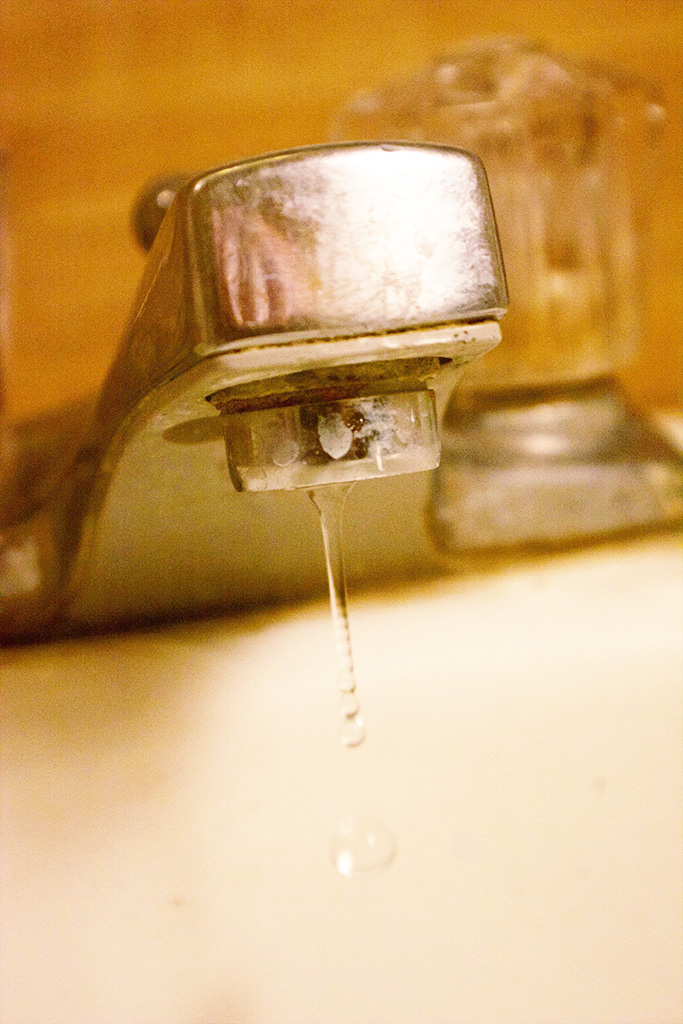
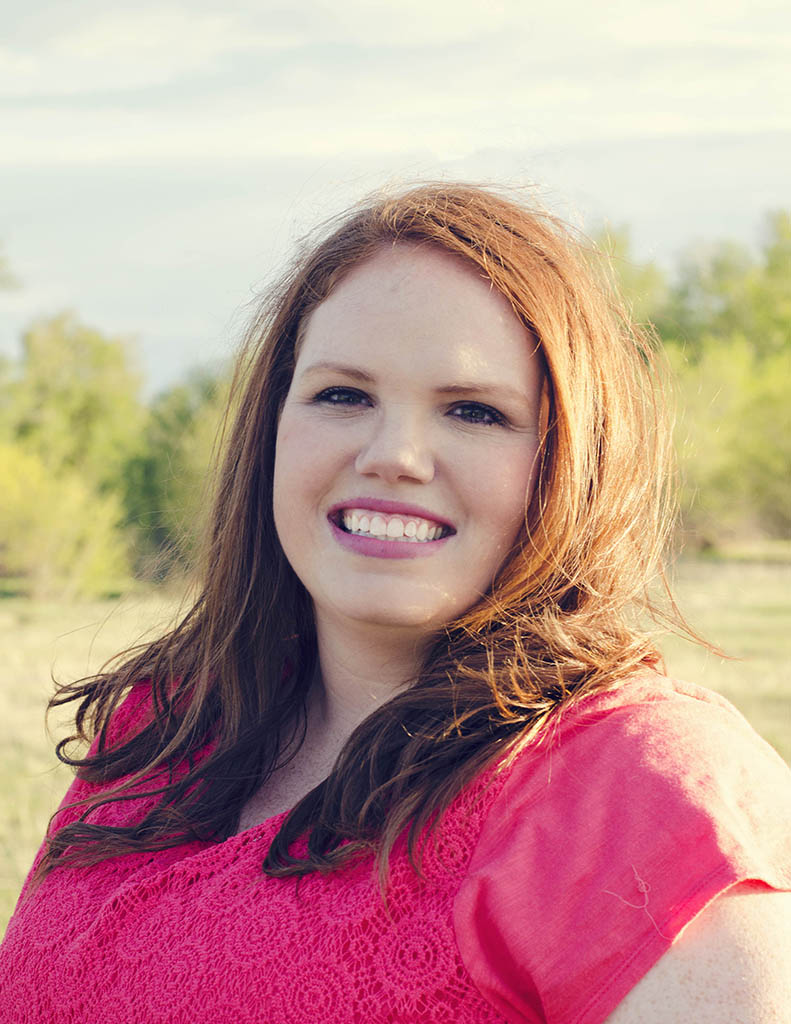
Shallow Depth of Field:

JaleneStradling_Shallow3

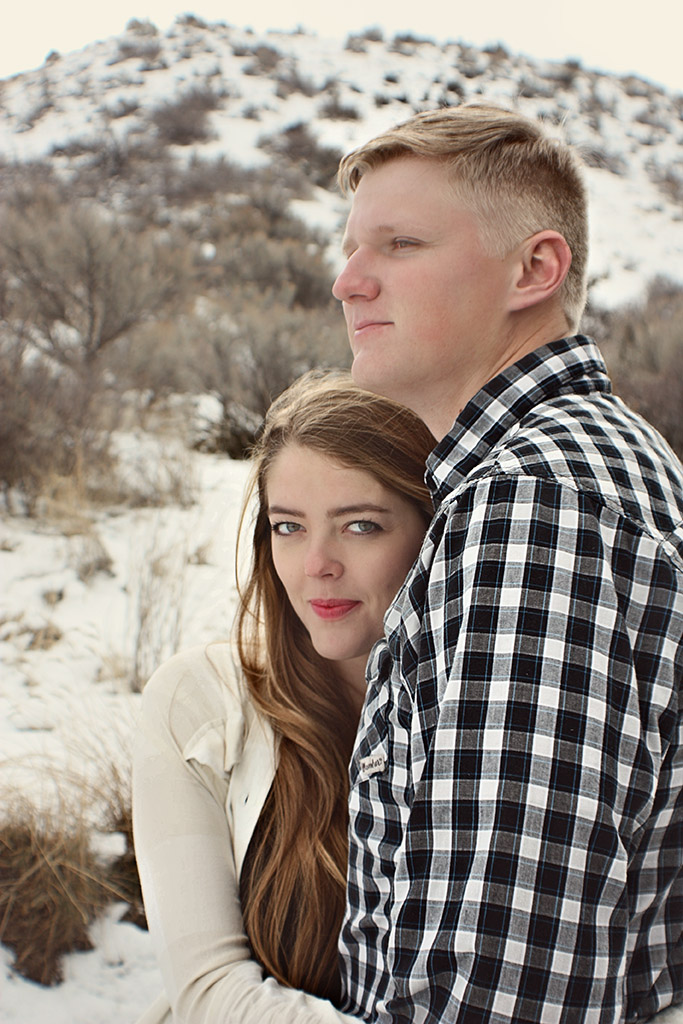
1. Young Love  2. 1/25, 1:00pm, Pocatello mountains 3. Focal Length  43  4. F/stop 5  5. Shutter Speed  1/250 6. Outside light, sunny day.

JaleneStradling_Shallow1

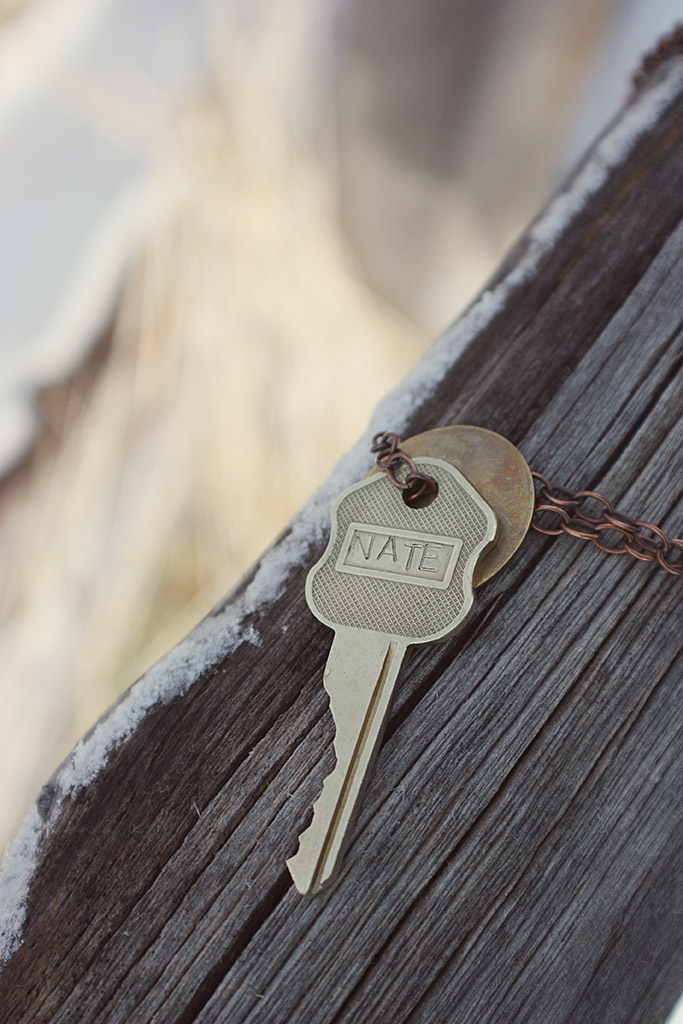
1. The Key to my Heart  2. 1/25, 12:20pm, Pocatello Mountains 3. Focal Length  53  4. F/stop 5.6  5. Shutter Speed  1/800 6. Outside light, sunny day.


Bonus fun image:

I saw the pitch fork and wanted to make this image look like the famousAmerican Gothic Painting.  I wasn’t completely sure how it was set up and didn’t have my phone handy, but I love how it turned out.  I added some “old school” actions to it to add to the essence of the portrait.

JaleneStradling_Shallow4

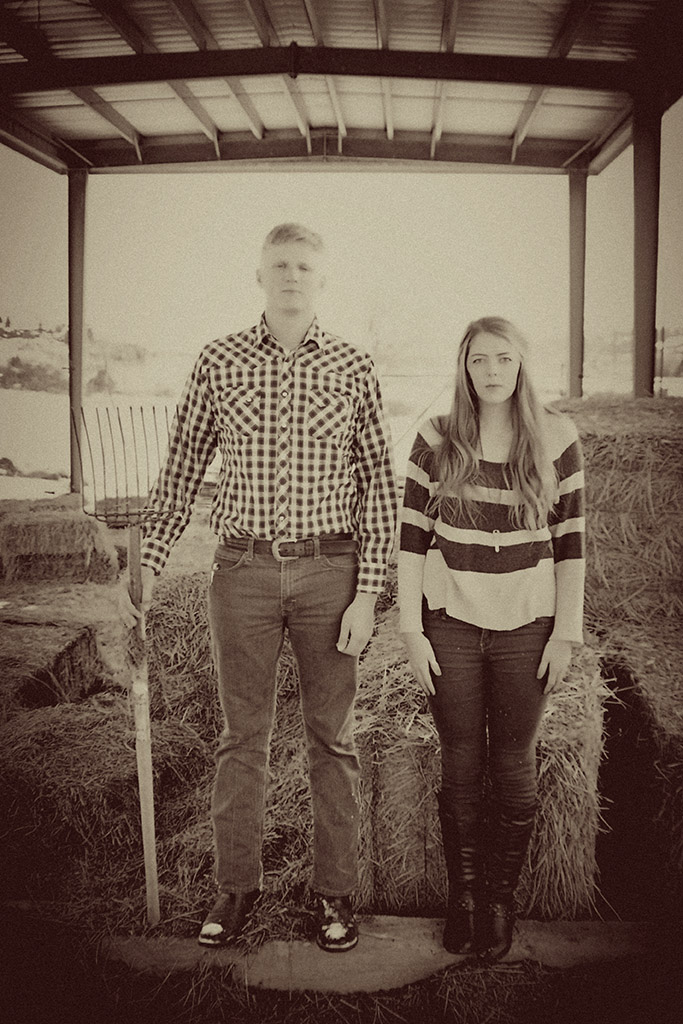
1. Faux American Gothic  2. 1/25, 2:00pm, Ross Park Pocatello 3. Focal Length  33  4. F/stop 4.5  5. Shutter Speed  1/100 6. Outside light, sunny day.


Blog 3 LIGHT – Motion: Freeze and Blur

Freezing Motion

I love glitter and thought it would be fun to play with capturing how it falls in a photograph.  I set up a spot on the table with my camera on a small tripod and had my husband pouring the glitter as I snapped the shot.  The next shot I was playing around with stopping the motion of water, we tried several different set ups of my husband pouring the water, but the most interesting drops came straight from the faucet.  I think its cool to see how the droplets form. I set up the shot by resting the camera on the sink and turning the faucet on to barely drip.

JaleneStradling_GlitterMotion

1. Glitter Freeze  2. 1/19, 3:00pm, living room  3. Focal Length  55  4. F/stop 5.6  5. Shutter Speed  1/1,000 6. Camera tripod and indoor apartment lighting

JaleneStradling_WaterDrop

1. Water Drops  2. 1/19, 3:10pm, living room  3. Focal Length  55  4. F/stop 5.6  5. Shutter Speed  1/800 6. Camera resting on sink and indoor apartment lighting

Blurring Motion

These photos were especially fun for my daughter since she got to help out and model for me.  I set up the shot by moving my camera with her as my husband pushed her past me in her toy car.  I also tried some glitter and focused on the pile of glitter to capture the falling motion of the glitter. Then finally I really like the pattern on my back pack and wanted to try blurring the image as I zoomed out, I like the popping pattern it created with the shapes and colors.

JaleneStradling_RollingCar

1. Child Driver  2. 1/19, 4:30pm, living room  3. Focal Length  18  4. F/stop 4  5. Shutter Speed  1/30 6. Camera moving with subject, indoor apartment lighting

JaleneStradling_GlitterFlow

1. Falling Glitter  2. 1/19, 3:05pm, living room  3. Focal Length  51  4. F/stop 5.6  5. Shutter Speed  1/60 6. Camera tripod and indoor apartment lighting

JaleneStradling_ZoomMotion

1. Geometric Zooming  2. 1/19, 5:00pm, living room  3. Focal Length  34  4. F/stop 13  5. Shutter Speed  1/25 6. Camera zoomed out while snapping photo.

Photobook Design

JaleneStradling-PhotoBookDesign-Comm300

I had a lot of fun designing this photo book layout. I got the privilege to take pictures for this adorable couple in the summer of 2012.  I was so excited to take pictures in this new location and to share the joy these pictures that would bring years of memories to my sweet cousin Maycee and her husband Cody for years to come.  I was even more excited to find out at the end of our session they were expecting their first baby and these pictures were a surprise for her mom for mothers day.  This has always been one of my favorite photo sessions.

Process:  I first chose the images that I wanted to use, then brightened and touched up the images in Adobe Photoshop.  I then sketched out some ideas on how I wanted to layout the images and text on the pages. Once I was ready to design the layout I used the tools in Indesign to make a grid and add the images and text.  I loved working through the whole process and designing a layout that was modern and fun.  I wanted the layout to be a showcase of some of the best images that I was able to capture and be a layout that would make a beautiful art piece in their home.

Past Photos

JaleneStradling-profileHello, my name is Jalene Stradling and I am a Web Design and Development major.  I am wife to my handsome husband (Nate) of almost 6 years and a mom to our 4 beautiful children, 2 of which we get the pleasure to raise here on earth! Paetyn is our oldest and she is 4, Nate is our youngest and he is 1.  They are our pride and joy.  We are originally from Arizona and moved to Idaho 2 years ago because my husband wanted better hunting!

About a year ago we both decided to go back to school.  This is hard with our children and no family close, but we make it work.  I originally graduated from the LDS Business College in Salt Lake about 8 years ago with 2 associates in Accounting and Business.  I took a photography/photoshop class while I was there and I loved it and hope to improve my skills this semester.

Below is some examples of my past photos that I have taken and edited in photoshop. I have gotten in a bad habit of just using my cell phone camera, but hope that this semester I will take more pictures with my dslr to truly capture all the beauty around me.

This image is one of my favorites of my kids and all I did was add a sepia action to the image and adjust it to how I wanted it to look.

JaleneStradling-PF2

This image was brightened up and I used some actions to smooth her skin and brighten her eyes some more.

JaleneStradling-PF3

This image was brightened up and I used some actions to smooth his skin and brighten her eyes some more, I also added some saturation to brighten the background some more.

JaleneStradling-PF10

This image was brightened and I added some actions with some yellow tones over top of the image to make the image warmer and a little foggy looking.

JaleneStradling-PF9

This image was brightened and I added some actions with some yellow tones over top of the image to make the image warmer and a little foggy looking, I also added a texture over top of the image and then removed it from her skin so the background looks like it has a linen texture.

JaleneStradling-PF7

This image was brightened and some saturation added to it.

JaleneStradling-PF8

This image was brightened and cropped. I love to create things with wood and sell them, this is one of my creations and product pictures.

JaleneStradling-PF5

These are also all of my creations and this image was cropped, brightened and had some saturation added it it to brighten the pink ampersand.

JaleneStradling-PF1

This image was first all colored black and white with an “old school” style action and then I used the art history brush to add some color back into the player and add to the focal point of the image.

JaleneStradling-PF6